Disclaimer:
- This Article on iNNovationMerge blog is for demonstration purpose.
- Each demonstration presents risk and hazards that must be fully understood before attempting
- It should be performed only by trained professionals
- iNNovationMerge is not responsible for any loss or damage whatsoever caused
- Before attempting understand the Experiment completely or Contact iNNovationMerge for any clarification to get started.
For Feedbacks | Enquiries | Questions | Comments - Contact us @ innovationmerge@gmail.com
What?
- Presenting information in meaningful way is important after generating data using sensors or after passing data to actuators.
- There are several ways to present information using electronic components such as LEDs, 7-Segments, Character LCD Displays and Color TFT LCDs.
- Selection of these components depends on the usecase, amount of information to be displayed and how user want to interact with the component.
- This article explains how can we leverage Full color 3.5” 480 *320 TFT LCD with Arduino UNO, which is one of the component to display the information with required size, font, color and to use the same as touch screen for input.
- TFT LCD Specifications
- LCD Type : TFT
- LCD Interface : SPI
- LCD Controller : ILI9486
- Touch Screen Type : Resistive
- Touch Screen Controller : XPT2046
- Colors : RGB, 65K colors
- Resolution : 480x320 (Pixel)
- Aspect Ratio : 8:5
- I/O Voltage :3.3V/5V
Why?
- From past 16*2 and 16*4 LCD Displays were commonly used to present information using Microcontrollers.
- Disadvantage of these displays are
- Limited space(Need to define character within matrix)
- Limited characters are supported to display
- More configuration to be done for custom characters
- Constant font size
- No color representation
- Full color 3.5” 480 *320 TFT LCD with Arduino UNO overcomes these disadvantages and provides better flexibility to display information.
How?
Hardware’s Required:
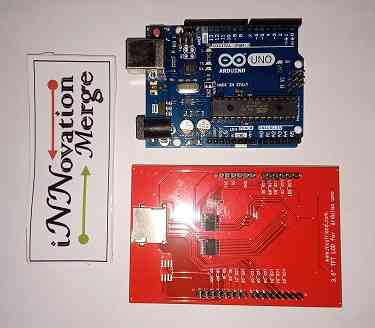
- ARDUINO UNO R3
- 3.5Inch TFT Touch Shield
- USB cable
Software’s Required:
Network Requirements
- Internet to download packages
Implementation
Block Diagram

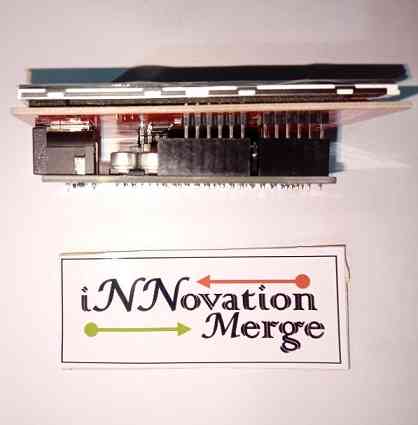
Connect LCD Module with Arduino UNO as Below
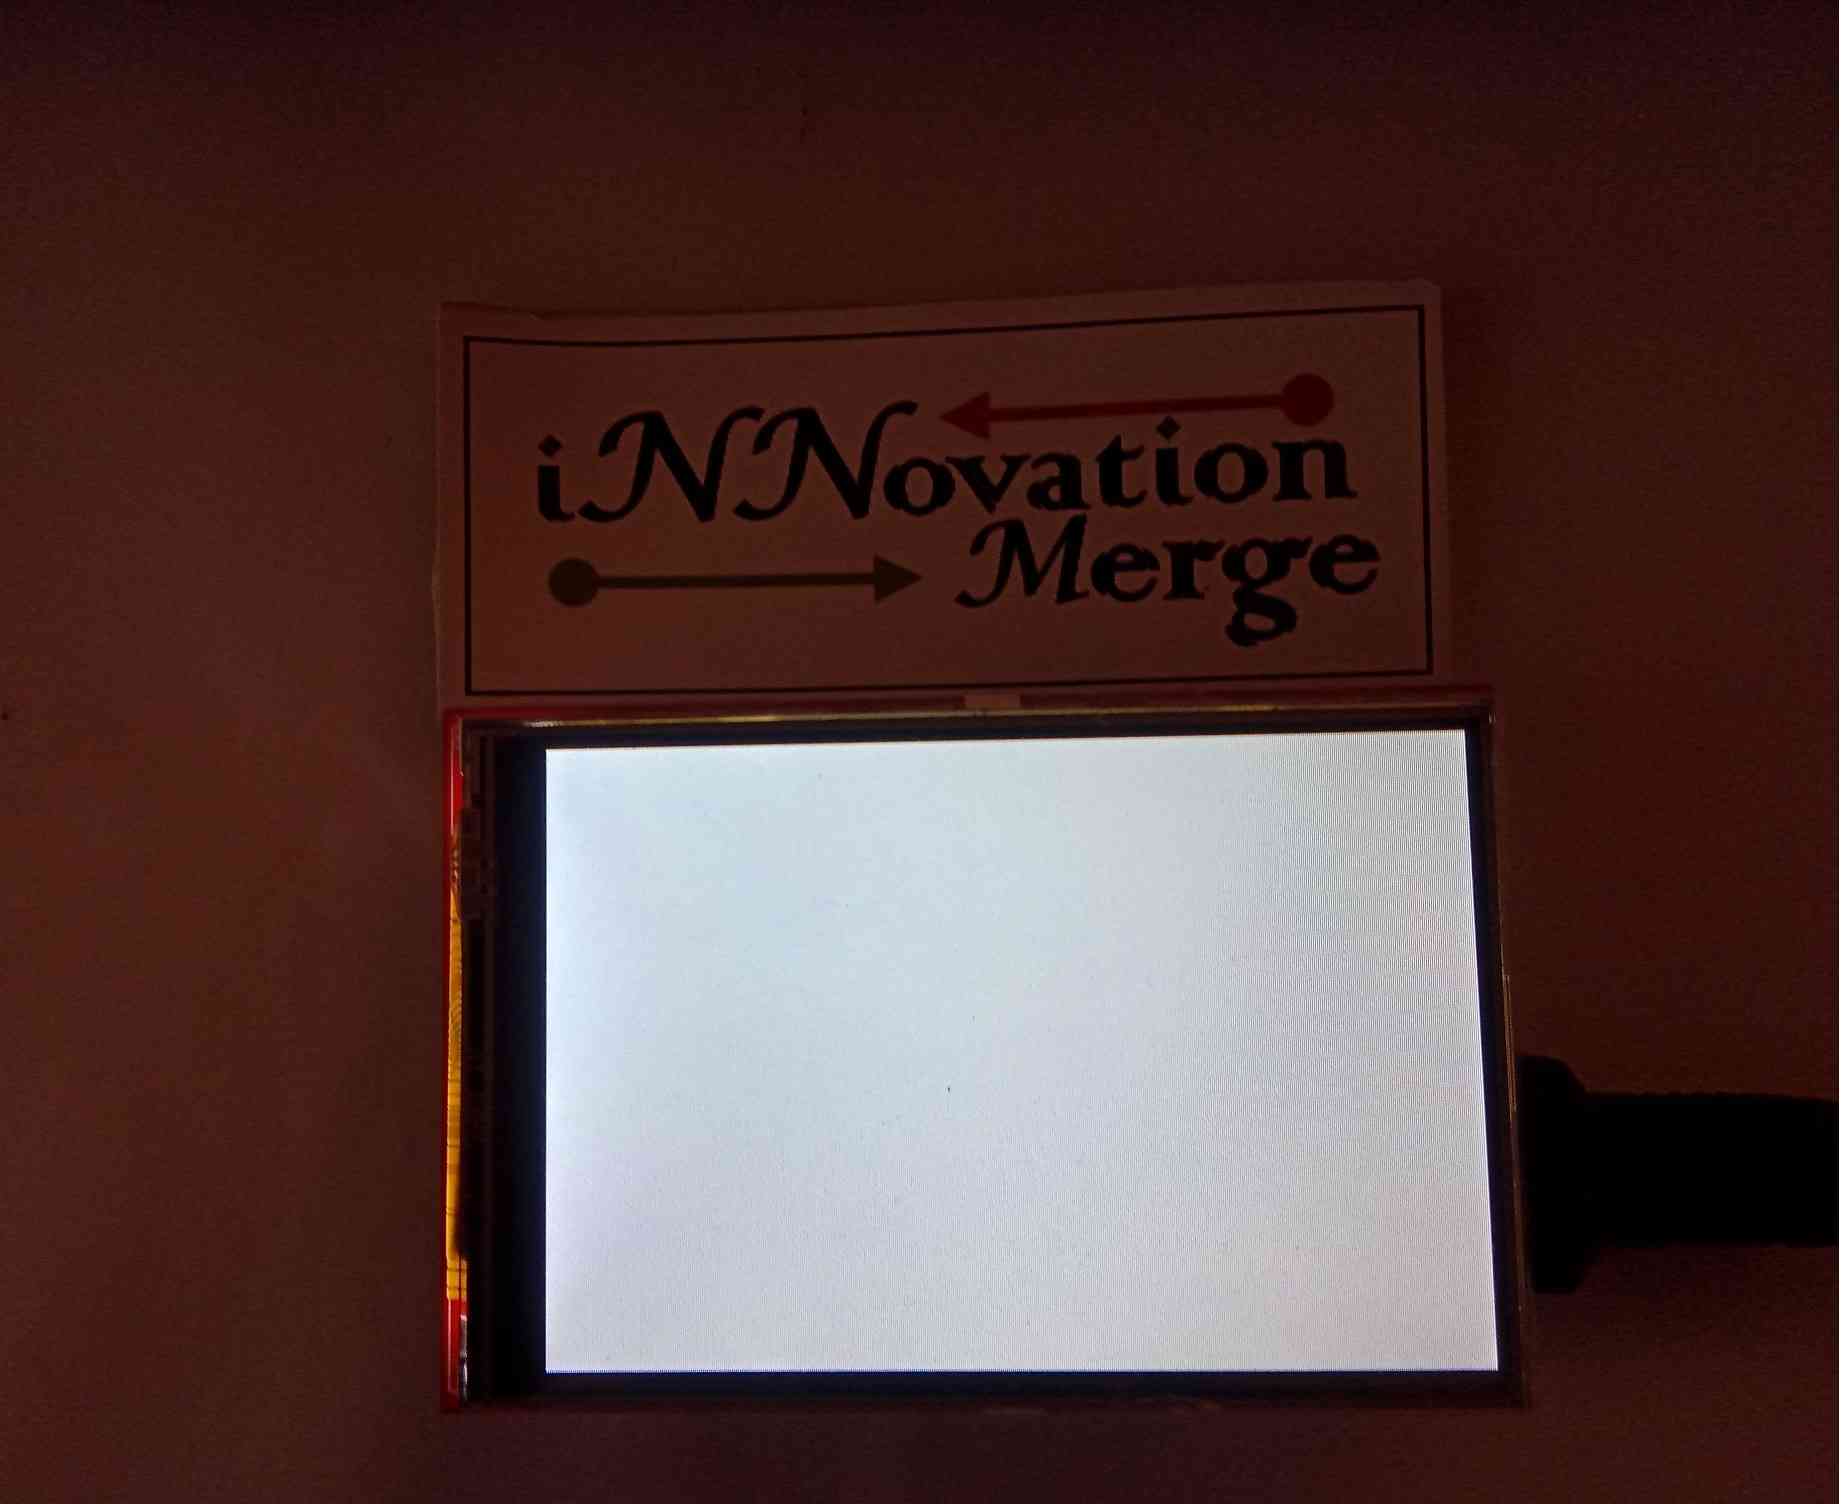
Connect Arduino UNO to Laptop, LCD should turn ON as below
Install below packages to run LCD
From Arduino IDE -> Sketch -> Include Library -> Manage Libraries
MCUFRIEND_kbv
Adafruit_GFX
TouchScreen
Adafruit_I2C


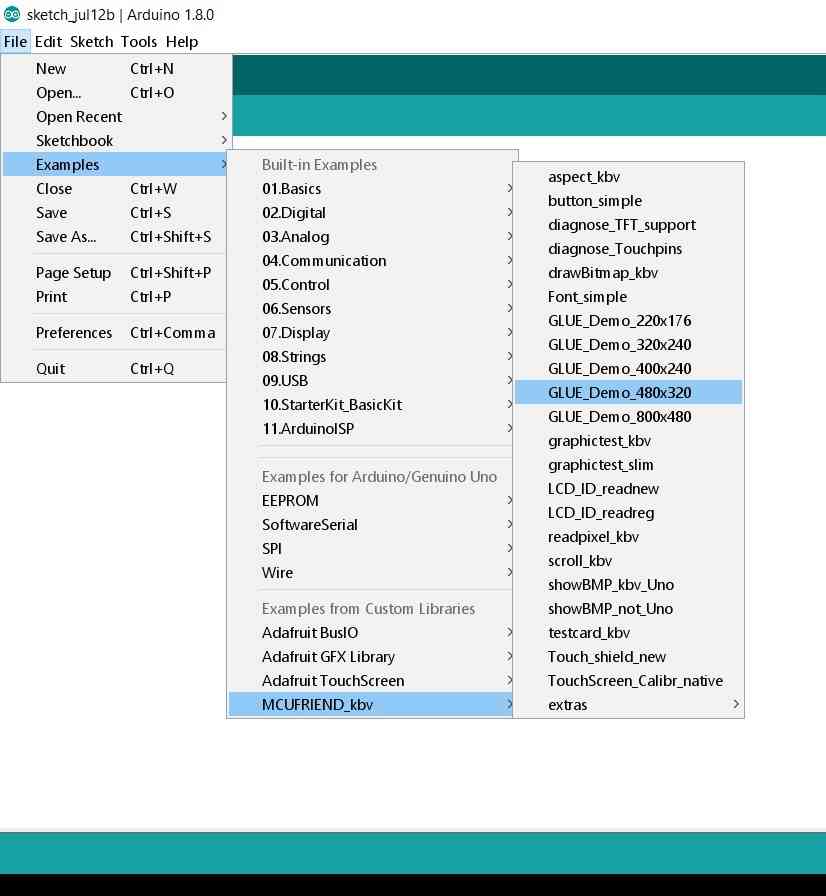
Run examples to run and explore TFT LCD Capabilities
From Arduino IDE -> File -> Examples -> MCUFRIEND_kbv -> GLUE_Demo_480x320
Output should be like below
Watch below video to see more examples
- Great, iNNovationMerge hope that you have understood how to get started with 3.5’’ TFT LCD with Arduino UNO