For Feedbacks | Enquiries | Questions | Comments - Contact us @ innovationmerge@gmail.com
What?
- Virtual box is a general purpose virtualization software designed for 32bit and 64bit hardware devices which allows users to run and administer mutiple guest operating systems in a same device.
- This article explains how to quickly install and use Ubuntu operating system without dedicated hardware using Oracle VirtualBox tool.
Why?
- Virtualization is useful when there will be requirment to run more than one OS at a time using the same machine/computer/host.
- This enables developers and administrators to work/learn different OS without spending precious time and money on new hardware.
- According to the VirtualBox manual, it can be used in below scenarios
- Running multiple operating systems simultaneously
- Easier software installations
- Testing and disaster recovery
- Infrastructure consolidation
How?
Running multiple OS at a time can be achieved by using Oracle VirtualBox.
Oracle VM virtualBox is a free and open-source hosted hypervisor used for virutalization.
It is a cross-platform application, It can be installed on existing computers which are running Windows, Mac OS X, Linux, or Oracle Solaris operating systems.
According to the VirtualBox manual Oracle VM VirtualBox runs below host OSes currently:
Windows hosts (64-bit):
- Windows 8.1
- Windows 10 RTM (1507 / 2015 LTSB) build 10240
- Windows 10 Anniversary Update (1607 / 2016 LTSB) build 14393
- Windows 10 Fall Creators Update (1709) build 16299
- Windows 10 April 2018 Update (1803) build 17134
- Windows 10 October 2018 Update (1809 / 2019 LTSC) build 17763
- Windows 10 May 2019 Update (19H1 / 1903) build 18362
- Windows 10 November 2019 Update (19H2 / 1909) build 18363
- Windows Server 2012
- Windows Server 2012 R2
- Windows Server 2016
- Windows Server 2019
Mac OS X hosts (64-bit):
- 10.13 (High Sierra)
- 10.14 (Mojave)
- 10.15 (Catalina)
Linux hosts (64-bit). Includes the following:
- Ubuntu 18.04 LTS, 19.03 and 19.10
- Debian GNU/Linux 9 (“Stretch”) and 10 (“Buster”)
- Oracle Linux 6, 7 and 8
- CentOS/Red Hat Enterprise Linux 6, 7 and 8
- Fedora 30 and 31
- Gentoo Linux
- SUSE Linux Enterprise server 12 and 15
- openSUSE Leap 15.1
Oracle Solaris hosts (64-bit only):
- Oracle Solaris 11
Software’s Required
Network Requirements
- Internet to download packages
Implementation
Open Oracle VM VirtualBox
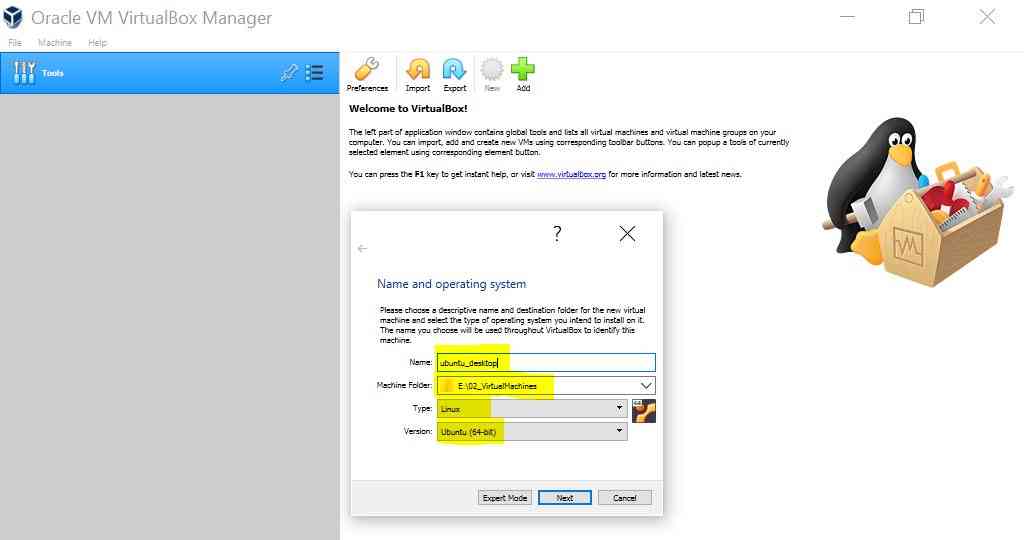
Click on New to create VM with below details
- Name : ubuntu_desktop
- Machine Folder : change drive as per your system
- Type : Linux
- Version : Ubuntu (64-bit)
- Click on Next
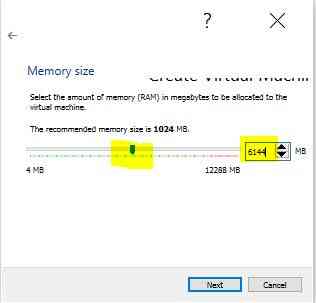
Set Base Memory (RAM)
- The recommended memory size is 1024 MB. You can increase as per your need as below
- Click next
Add Virtual Hard disk for VM

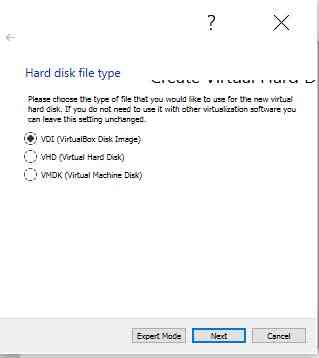
Define Hard disk file type
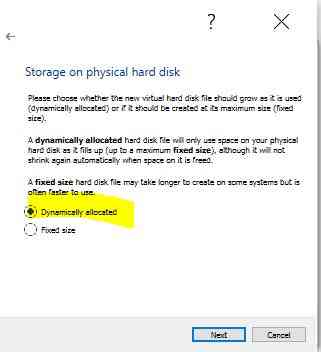
Define Hard disk allocation type
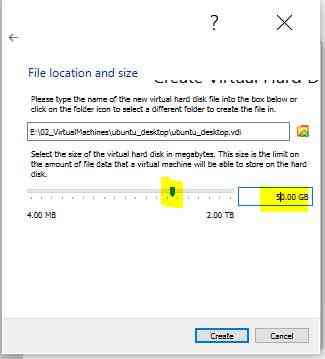
Select Hard disk location and Define Size
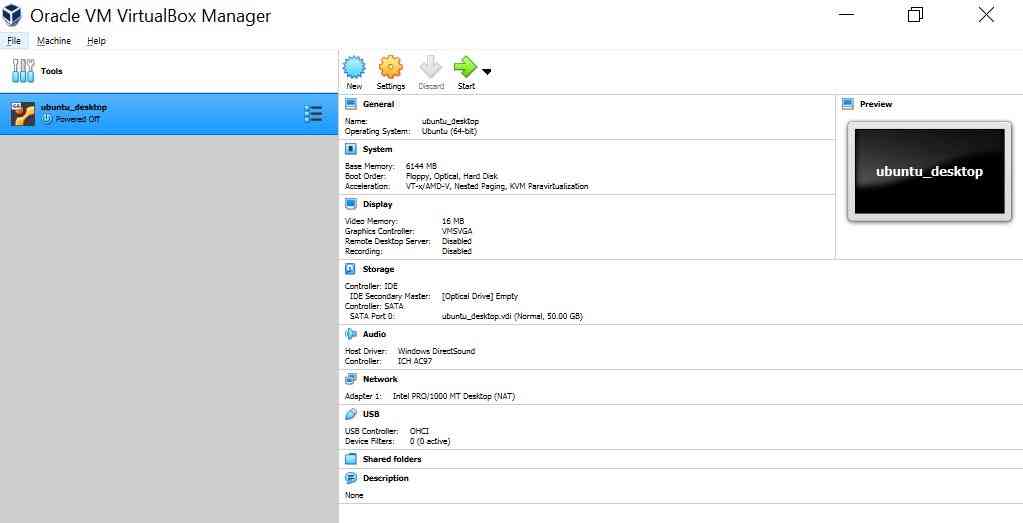
Review the VM Creation Information
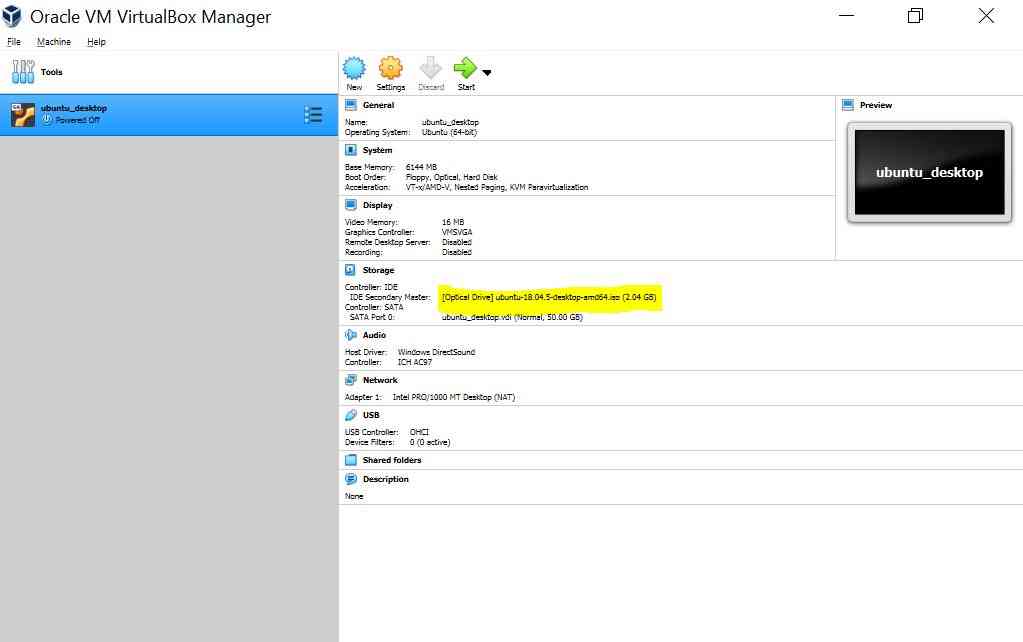
Attach ISO Image downloaded as Optical Drive
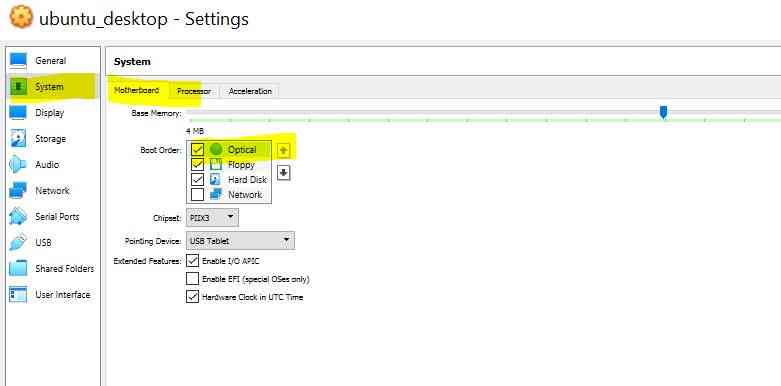
Click on Settings -> System -> Motherboard -> Boot Order
- Make Optical drive as first priority to boot
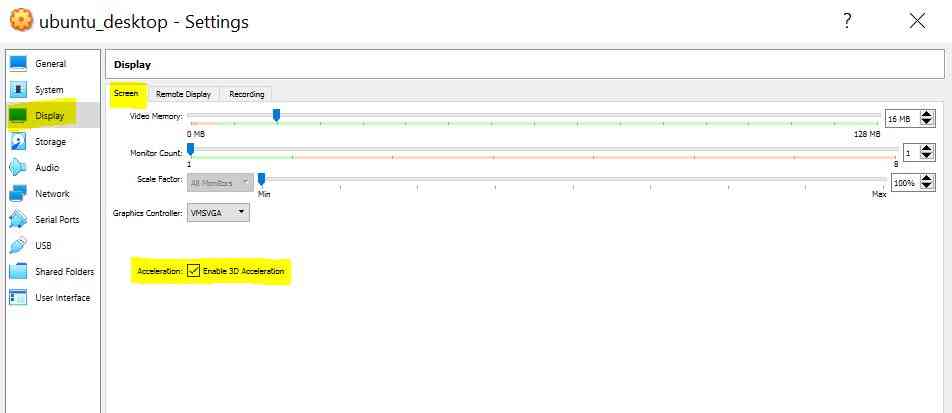
Click on Settings -> Display -> Screen
- Enable 3D Acceleration
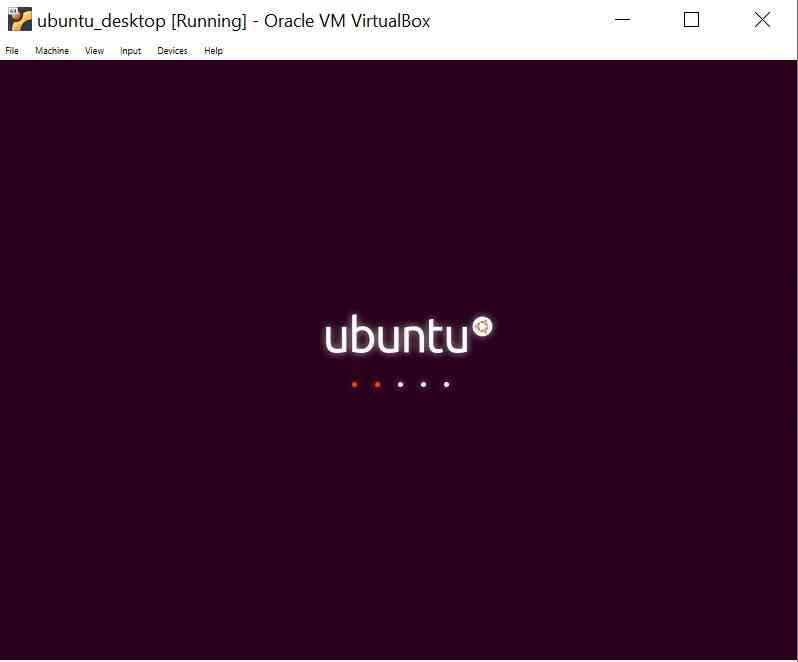
Go Back and Start VM
- This opens a new window with ISO Image boot
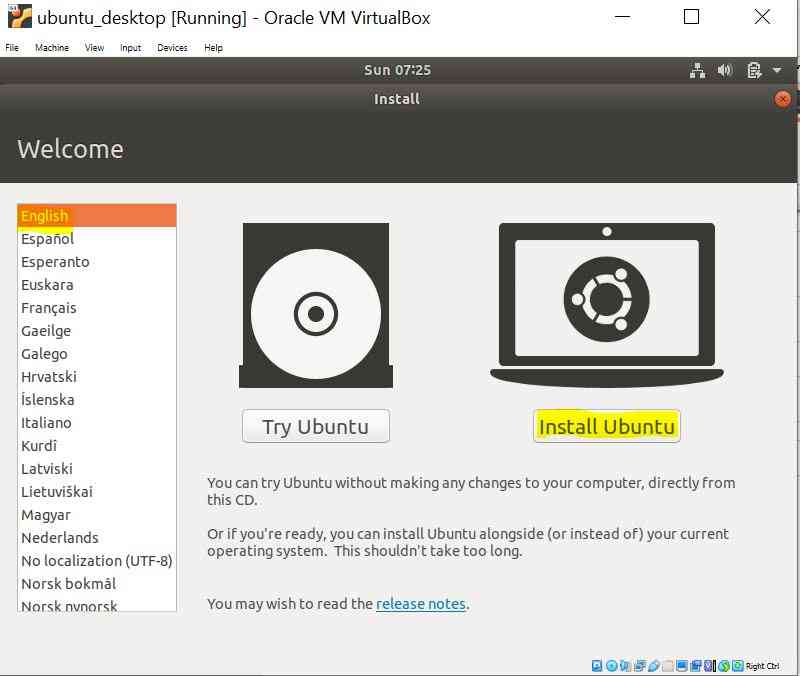
Select Language and Click on Install Ubuntu
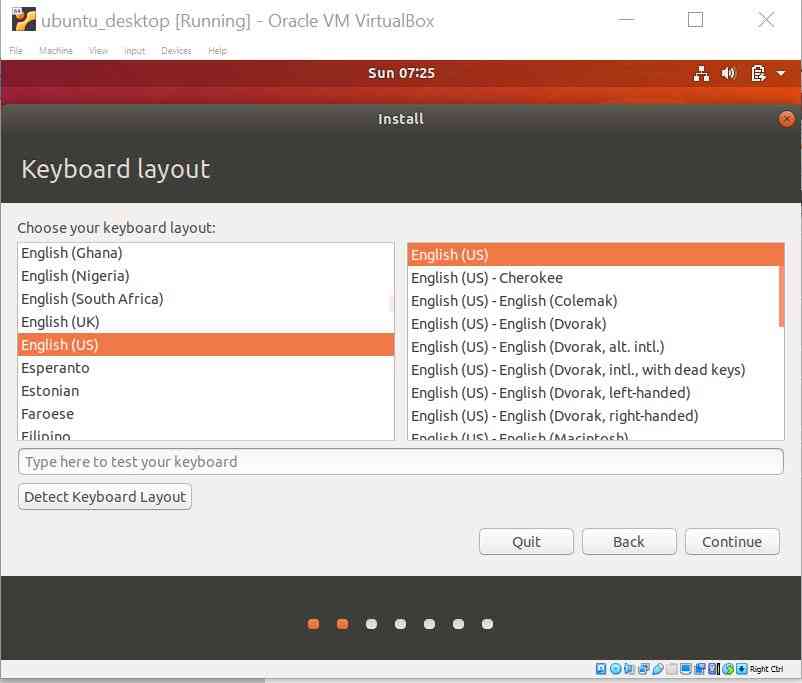
Select Keyboard Layout -> Continue
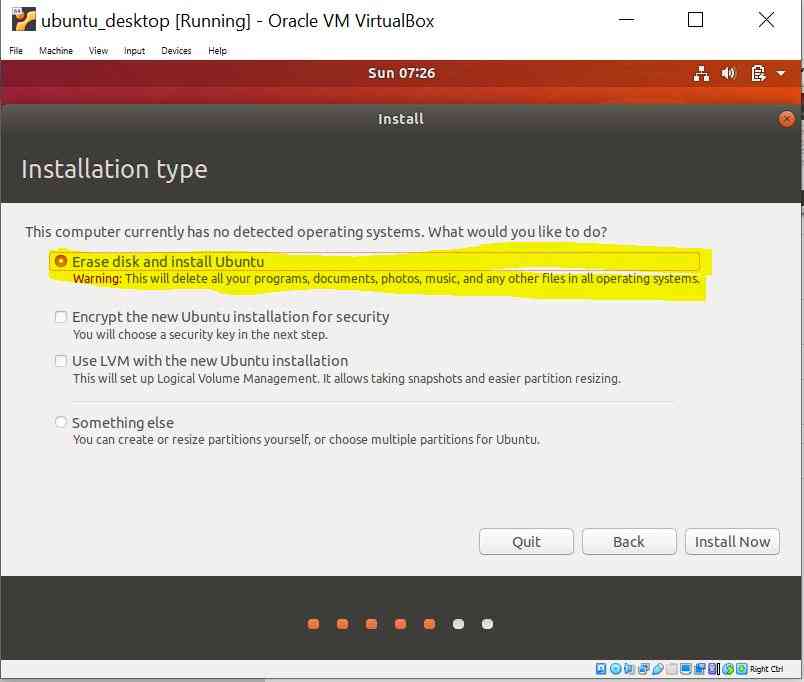
Select Erase disk and Install Ubuntu -> Install Now -> Continue
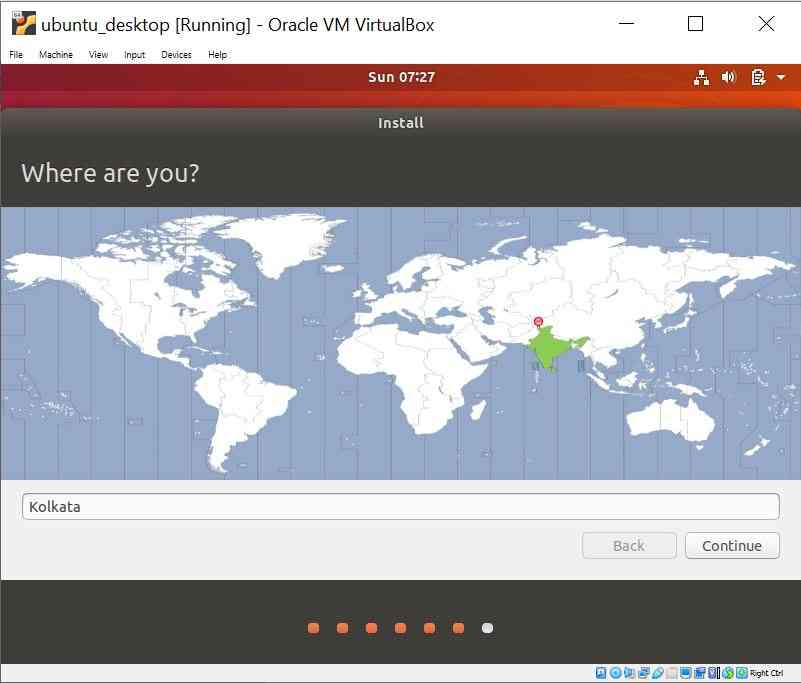
Select Location
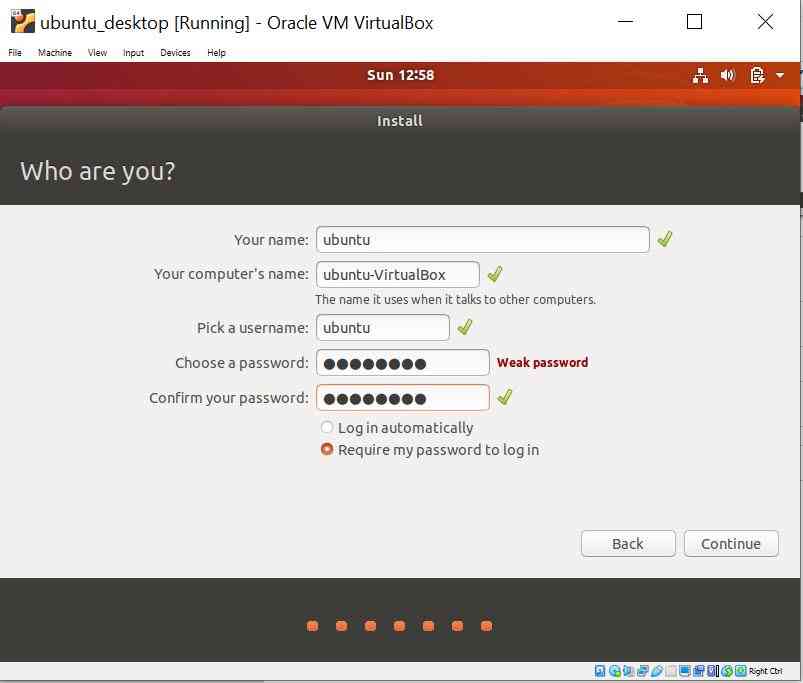
Enter Credential Information
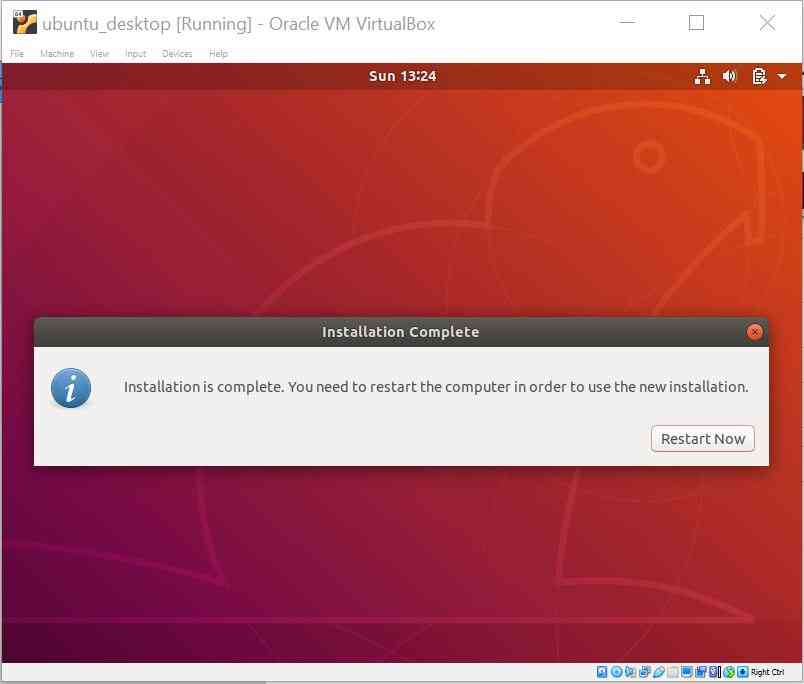
Installation Starts and completes
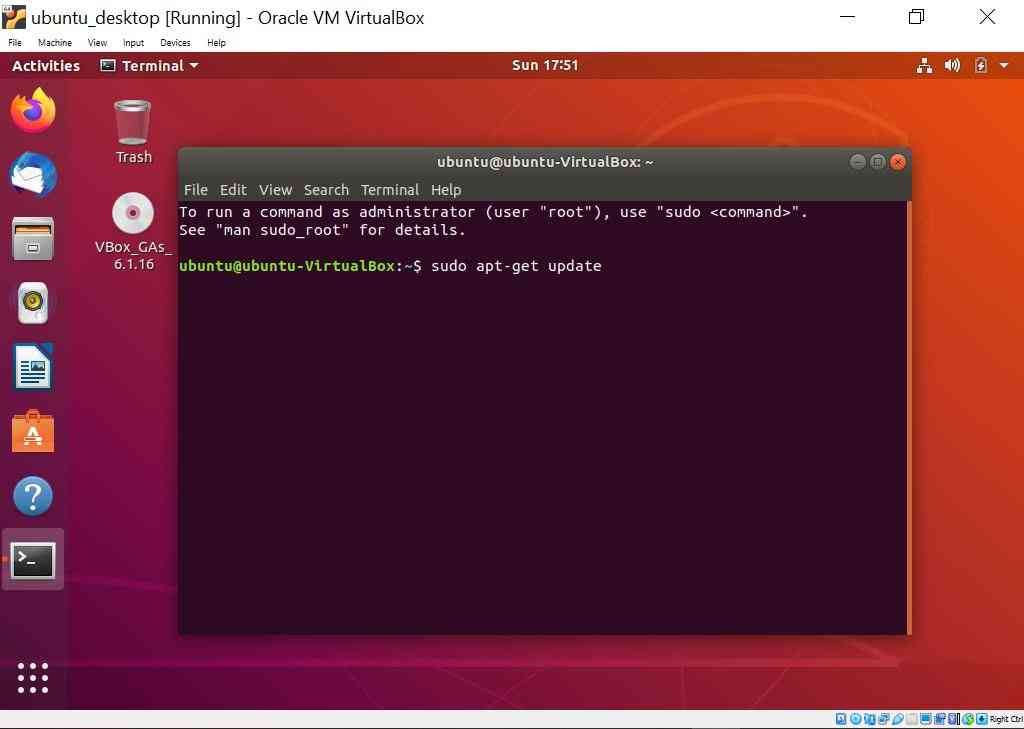
Run Ubuntu update
- sudo apt-get update
Great, iNNovationMerge hope that you have understood how to install and Run Ubuntu using Oracle VirtualBox