For Feedbacks | Enquiries | Questions | Comments - Contact us @ innovationmerge@gmail.com
What?
- Raspberry Pi is a low cost small CPU that can be connected to any HDMI supported Display, Standard Keyboard Mouse and Storage.
- It is developed by Raspberry Pi Foundation. It is a very cheap computer which can run supported operating systems along with set of GPIO pins allowing to connect and control external physical devices.
- This made easy to implement and explore Internet of Things(IoT). This is the verified and supported boards from multiple IoT vendors.
- Due to the multiple iterations since Raspberry pi launched there are multiple models available depending on the configuration.
- Explore different models availabe from this link.
- This articles explains basic step to get started with Raspberry Pi on
Windows 10.
Why?
- Basic question to get started with Raspberry Pi board is how to install and run the OS on it.
- To use Raspberry Pi with any project
Raspberry PI OSis the recommended operating system. - This OS is Debian based, has over 35,000 packages precompiled and available for installation to Raspberry Pi.
How?
- Raspberry PI OS image is written to SD card using another computer with a SD card reader.
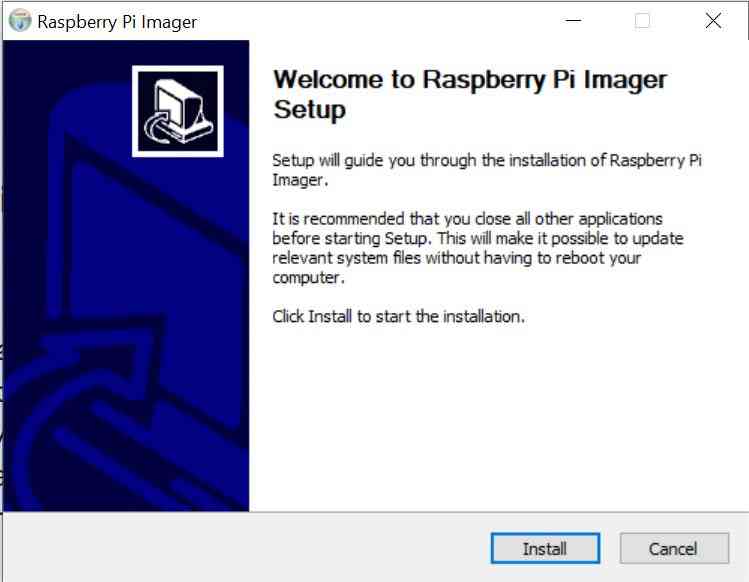
- Recently Raspberry Pi Foundation announced a standalone graphical software to download and write an OS to the SD card.
- The software name is
Raspberry Pi Imager. It works on Windows/ Ubuntu 18.04/ Mac OS. - The list of Operating system is available in this link.
Software’s Required
- Windows 10 OS
- Raspberry Pi Imager
Hardware’s Required
- Laptop/Desktop
- Raspberry Pi 3 model B
- 5V 2A Micro USB Power Supply for Pi
- 16GB/32GB Class 10 micro SD Card
- HDMI Cable
- Wifi/Ethernet Cable
- Keyboard for Pi
- Mouse for Pi
Network Requirements
- Internet to download packages
Implementation
From laptop/Desktop Download and Install [Raspberry Pi Imager] (https://www.raspberrypi.org/software)
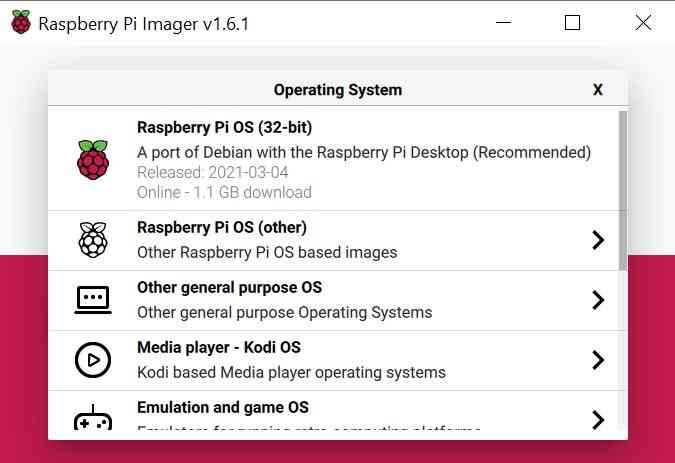
Open Raspberry Pi Imager and Click on Choose OS -> ERASE
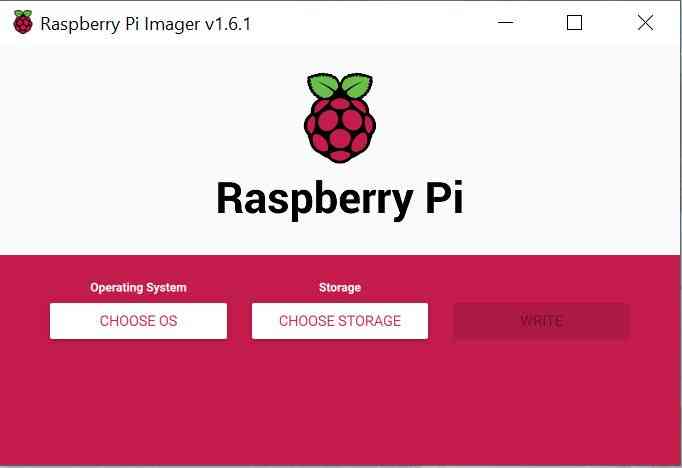
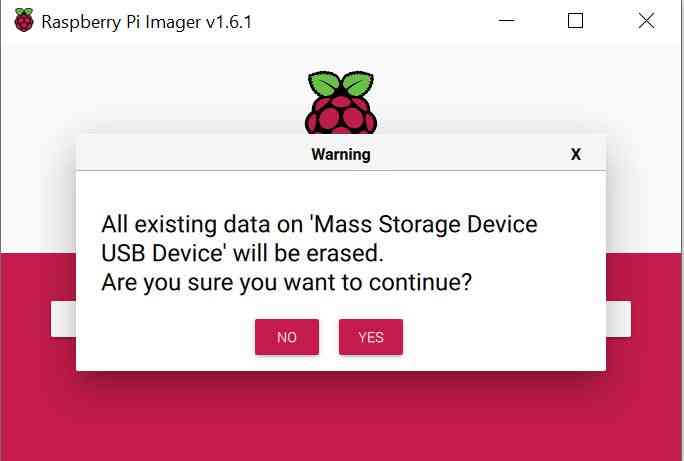
Insert micro SD Card to another computer and Select Storage

Verify and Erase exising data
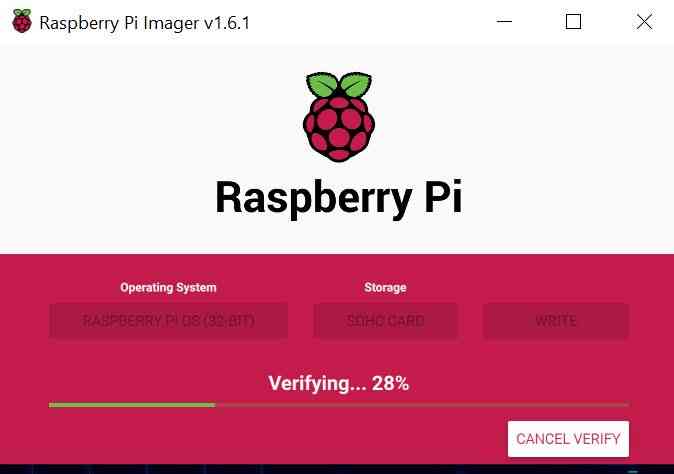
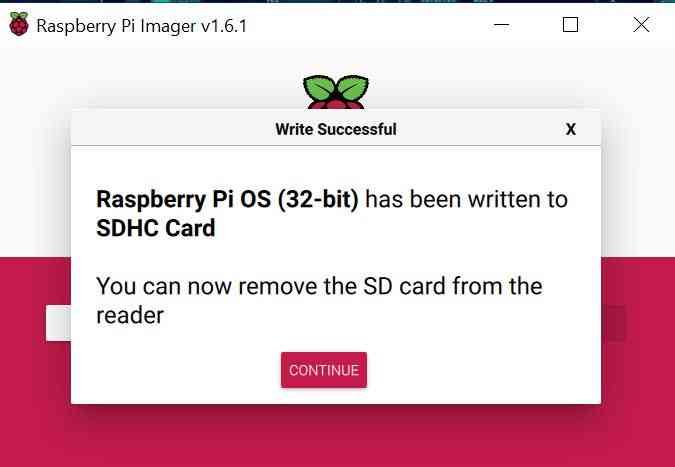
Once the data is erased, again select OS -> Raspberry PI OS(32-BIT) -> Write
Remove SD card and connect to Raspberry Pi
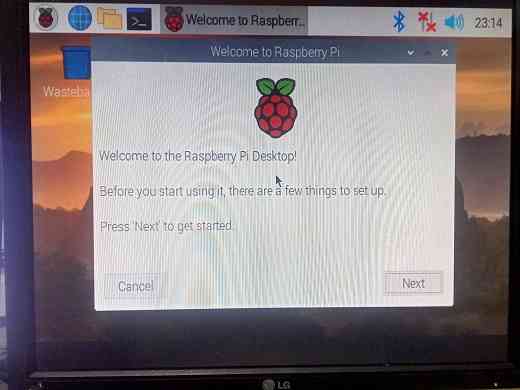
Boot Raspberry PI OS
Update Rasberry Pi OS

Connect to network

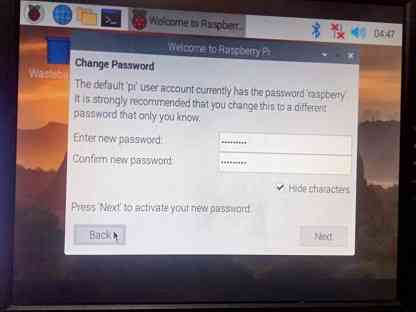
Change default password
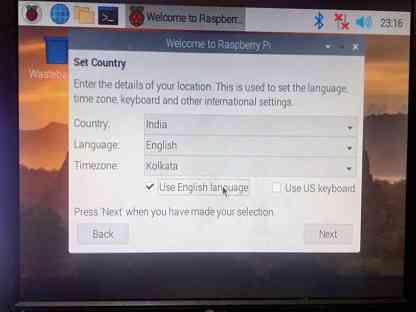
Change country settings
Great, iNNovationMerge hope that you have understood how to install and Run Raspberry Pi OS using Raspberry Pi Imager on Raspberry Pi